Let’s change your backyard into an exciting obstacle course with these DIY ideas you can tackle in a weekend! We’ve tested countless combinations and found that starting with simple stations like tire runs, rope climbs, and balance beams creates the perfect foundation. Through our backyard quests, we’ve uncovered that repurposing everyday items like pool noodles for tunnels and garden stakes for agility ladders saves both time and money. Our favorite setup includes colorful tire challenges, crawling stations, and jumping obstacles – all arranged with safety in mind using shock-absorbing surfaces and proper spacing. These creative obstacles will keep your family active and entertained, with plenty of options to adjust difficulty as skills improve.
Key Takeaways
- Create a tire run by spacing cleaned and painted tires 18-24 inches apart, perfect for running and jumping challenges.
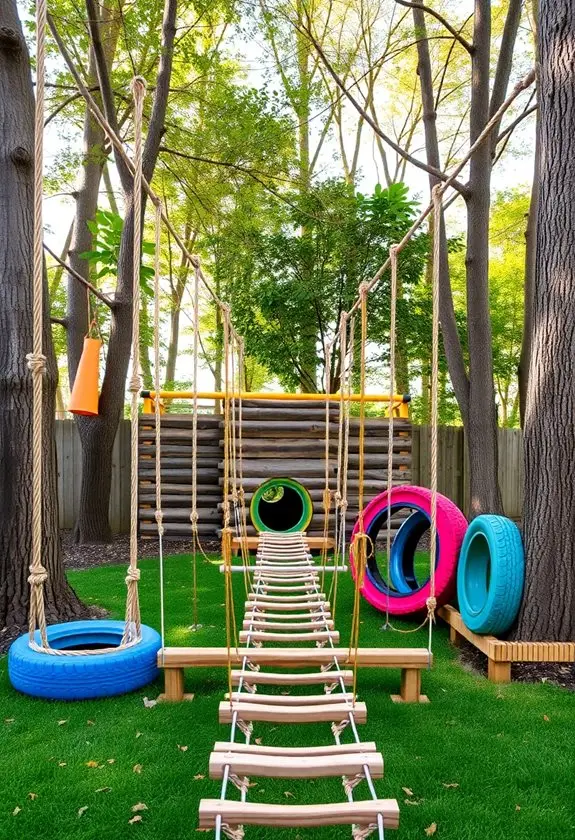
- Install a rope climbing station between sturdy trees, featuring horizontal crawls and spider web patterns using paracord.
- Build a quick DIY agility ladder using duct tape and paint stirring sticks for an effective training tool.
- Design curved tunnels using pool noodles and garden stakes, rotating configurations regularly to maintain excitement.
- Set up jumping stations using PVC pipes, laundry baskets, and old tires with proper spacing for safety.
Planning Your Course Layout
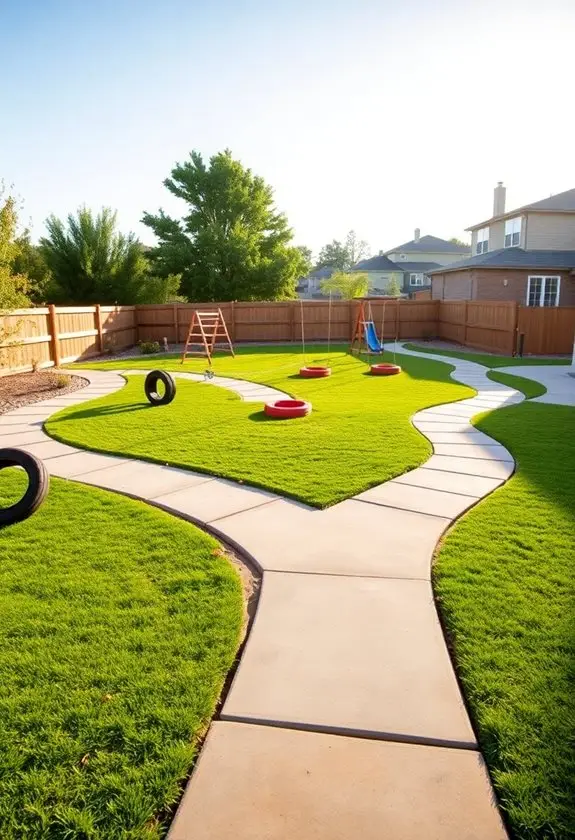
Creating a backyard obstacle course starts with smart space planning and careful assessment of your available area. We’ll want to survey every inch of our yard, looking for natural features we can incorporate while ensuring there’s enough room for participants to move freely and safely between obstacles.
The regular inspections of the course and surrounding area will help maintain safety standards over time. Let’s start by mapping out the perfect route through our space. We’ve found that incorporating existing elements, like that sturdy oak tree or gentle slope in the corner, adds character and challenge to our course.
As we’re planning, we’ll make sure to leave adequate clearance around each obstacle and create clear pathways that flow naturally from one challenge to the next.
When we design the layout, we’ll want to think strategically about progression. Just like we’ve learned from setting up our own courses, it’s best to start with simpler obstacles and gradually increase difficulty.
We recommend placing climbing challenges near trees, balance beams in flat areas, and crawling sections where the ground is already level. Remember, we can always adjust the course difficulty by modifying individual obstacles rather than redesigning the entire layout – that’s the beauty of DIY obstacle courses!
Essential Safety Guidelines
With safety as our top priority, we’ll establish essential guidelines to protect everyone enjoying our backyard obstacle course.
We’ve learned from experience that preparation is key, so let’s start by thoroughly inspecting our yard for any hidden hazards like rocks, roots, or uneven ground. Regular inspection of all course materials and structures will help prevent wear-related accidents.
When it comes to choosing materials and setting up obstacles, we’re always mindful of these vital safety steps:
- Install shock-absorbing surfaces beneath climbing elements and high-impact zones – we love using rubber mulch or foam padding.
- Secure all structures firmly to the ground, ensuring they won’t tip or shift during use.
- Create clear pathways between obstacles, maintaining at least 3 feet of clearance.
- Set up designated “rest zones” where participants can safely wait their turn.
We’ll want to keep a watchful eye on weather conditions too. If there’s rain in the forecast or it’s particularly hot outside, we’ll need to postpone our obstacle course excursions.
Remember to position adult supervisors strategically throughout the course, and always keep that first aid kit handy – better safe than sorry!
Before anyone starts, we’ll review the rules together and demonstrate proper techniques for tackling each obstacle.
Choosing Backyard Materials
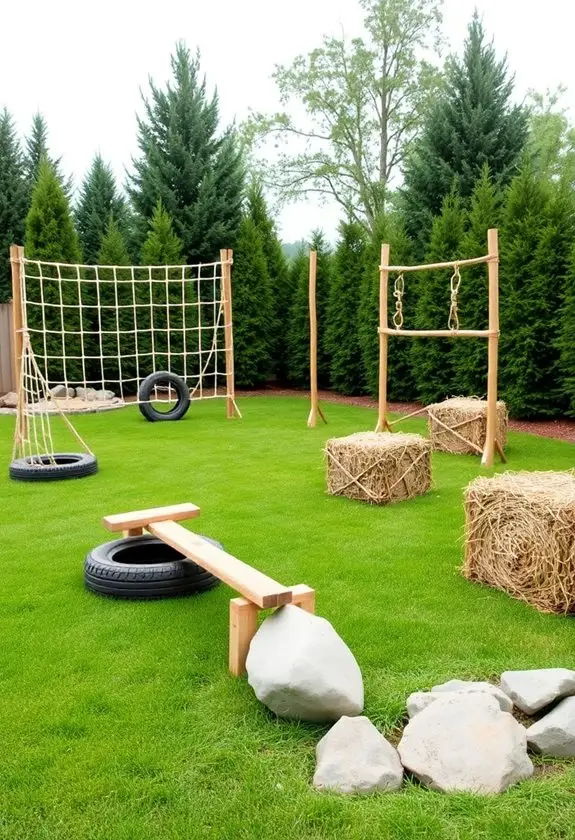
Success in building an engaging obstacle course starts with selecting the right materials from your backyard and household items. We’ve found that nature often provides the best building blocks – those low-hanging tree branches are perfect for creating climbing challenges, while sturdy logs and wood slices make excellent balance beams and stepping stones. Physical strain levels remain manageable for kids while keeping them motivated to complete the course.
Let’s get creative with everyday items you probably have lying around. Those pool noodles you’ve stored since last summer? They’re fantastic for creating soft barriers and limbo stations. We love using hula hoops as ground markers for jumping sequences, and spare boxes can change into crawl-through tunnels with a bit of imagination. Consider using reclaimed wood pallets to create elevated platforms and climbing stations.
For more permanent features, we recommend incorporating your existing surroundings. Trees can anchor rope swings and climbing challenges, while natural pathways between bushes create ready-made running routes.
Don’t forget about those household items gathering dust in the garage – jump ropes can outline course limits, and plastic storage bins make great obstacles. When we built our first course, we realized that water bottles filled with different amounts of water created perfect weighted challenges for zigzag runs.
Building The Tire Challenge
Building a tire challenge adds an exciting dimension to any backyard obstacle course. We’ve found that old tires, which you can often get for free from local auto shops, are perfect for creating various physical challenges that’ll keep kids moving and engaged for hours.
Let’s start with the basic setup steps that we’ve tested in countless backyard renovations:
- Clean all tires thoroughly with soap and water
- Drill drainage holes in the bottom to prevent water collection
- Paint the tires in bright colors for visual appeal
- Position tires strategically based on age group abilities
When we design tire challenges, we love combining different elements to create a complete circuit. Start with a simple tire run where kids step through aligned tires, then add a tire-flipping station for upper body strength. This type of obstacle course provides essential sensory and vestibular stimulation for developing children.
We’ll often include a tire pull section using sturdy rope, which really gets those muscles working! For added excitement, we create elevation changes by positioning tires on gentle slopes, making sure they’re firmly secured in place.
Remember to space your tires appropriately – we typically allow 18 inches between stepping tires for younger kids and 24 inches for older participants.
Creating Balance Beam Stations
Balance beams change an ordinary backyard obstacle course into an engaging challenge that develops core strength and coordination.
We’ve found that using a 4x4x8 foot pressure-treated beam creates the perfect foundation for this exciting station. The entire project can be completed in less than 20 minutes from start to finish. Let’s convert your backyard into a skill-building paradise!
To get started, we’ll need three 1-foot sections of 2×4 wood for the legs, which we’ll attach using a kreg jig for maximum stability. For added support, we’re cutting two 14-inch pieces of 2×4 pressure-treated wood.
We love using 2-1/2-inch deck screws to secure everything together – they’re incredibly reliable!
Here’s a pro tip we’ve learned through trial and error: consider creating both horizontal and inclined beams to vary the difficulty level.
Paint fun patterns on the wood to make it more inviting, but don’t forget to add a slip-resistant coating.
We always make certain there’s proper clearance around the beam – about 12 feet by 17 feet of fall zone space.
Remember to supervise children aged 5-12 as they traverse this challenge.
You’ll be amazed at how quickly they develop balance, coordination, and confidence!
Rope Climbing Adventures
While balance beams test coordination at ground level, rope climbing takes our backyard obstacle course to new heights!
We’ve found that creating rope-based challenges adds an exciting vertical dimension that kids absolutely love, and there’s something magical about watching them build upper body strength while having fun. Old ladders can enhance climbing opportunities when securely attached to rope elements.
Let’s start with some basic rope climbing stations that we’ve tested in our own backyard. For beginners, we recommend these kid-friendly options:
- Create a simple rope swing between two sturdy trees
- Design a horizontal rope crawl about 2 feet off the ground
- Set up a basic rope ladder using wooden rungs
- Install a spider web pattern using paracord between posts
For safety, we always place soft mulch or rubber mats underneath our rope elements, and we’ve learned that regular inspection is essential.
When choosing ropes, we opt for weather-resistant polypropylene or climbing-grade materials that’ll withstand the elements. Start with lower heights and gradually increase the challenge as skills improve.
Remember, supervision is key, especially for younger climbers!
Pro tip: We love combining rope elements with traditional climbing holds to create hybrid challenges that keep everyone engaged.
DIY Agility Ladder Setup
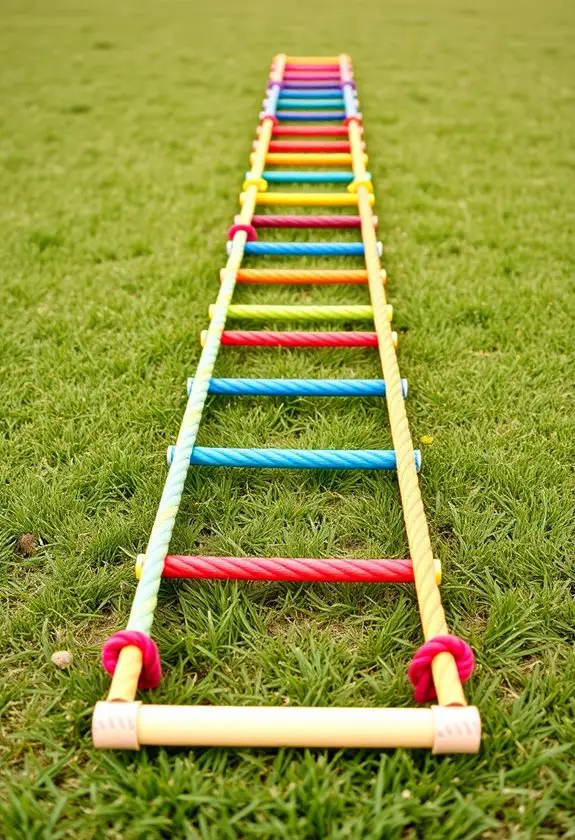
A few simple materials can change into an effective agility ladder that rivals store-bought versions.
We’ve found that the duct tape method is incredibly reliable, using 30 feet of tape and 11 paint stirring sticks to create a professional-looking ladder that’ll last for months. Taking just 10 minutes to complete, this DIY project is a quick win. Trust us, you’ll save around $30 compared to retail options!
Let’s get started with our favorite approach. First, we’ll lay out two parallel strips of duct tape, sticky-side up, spacing them about one paint stick apart. Next, we’ll position our paint sticks at 18-inch intervals, creating perfect rungs for footwork drills. Once everything’s aligned, we’ll fold the tape edges over to lock everything in place.
For those who prefer a more durable solution, we love working with PVC lattices. You’ll need 6 pieces cut to 20 inches each, connected with plastic cable ties.
We’ve found this method particularly useful for outdoor setups, as it holds up beautifully against weather and frequent use. Remember to choose a flat, obstacle-free area in your yard, and you’ll be practicing those fancy footwork drills in no time!
Outdoor Crawling Tunnels
Now that you’ve perfected footwork drills, let’s bring crawling into the mix! Creating fun and engaging tunnels for your obstacle course doesn’t require fancy equipment – we’ve found that everyday items work perfectly. Pool noodles and garden stakes make fantastic curved tunnels, while a row of lawn chairs creates an instant crawl-through challenge.
Consider rotating tunnel configurations regularly to maintain children’s engagement and keep the experience fresh.
Here’s our favorite DIY tunnel setup that we’ve tested with kids of all ages:
- Start with 4-5 pool noodles, spacing them about 2 feet apart.
- Secure each noodle into the ground using sturdy garden stakes.
- Curve the noodles to create an arch, securing both ends.
- Connect multiple arches using zip ties for a longer tunnel.
For added excitement, we love incorporating natural elements like logs and tree stumps to create varying heights and challenges. Recycled rubber mats provide excellent stability and cushioning beneath tunnel entrances and exits.
Remember to place your tunnels on soft surfaces like grass, and always check the stability before letting kids plunge in. We’ve found that connecting tunnels to other obstacles, like placing them under balance beams or incorporating them into hillsides, adds an extra layer of exploration to your course.
Don’t forget to regularly inspect your tunnel setup – safety first!
Setting Up Jumping Obstacles
Leaping into jumping obstacles adds an exciting dimension to any backyard course! We’ve found that mixing different heights and types of barriers keeps kids engaged while building their confidence.
Let’s start with low obstacles, like PVC pipes propped on blocks, and gradually increase the challenge as they improve. A 36-foot space requirement ensures everyone has plenty of room to safely navigate the obstacles.
Similar to regulation ping pong tables, you’ll want to leave 3-5 feet of clearance around each jumping station for safety and movement.
For our DIY jumping stations, we love using everyday items you’ll find around the house. Try turning laundry baskets upside down with broom handles across them, or arrange old tires in patterns for hopscotch-style jumps.
We’ve had great success combining these with other obstacles – imagine jumping over a barrier, then immediately crawling through a tunnel!
Safety’s our top priority, so we always guarantee soft landing spots and proper spacing between obstacles. When we set up courses for neighborhood kids, we’ll create different difficulty levels by varying barrier heights.
A pro tip we’ve learned: position jump obstacles on level ground and use rubber mats or grass for landing areas.
Don’t forget to integrate fun elements like sprinklers during summer months – there’s nothing better than jumping through a rejuvenating splash of water!
Timing and Progress Tracking
Once you’ve constructed your exciting jump obstacles, tracking progress adds a whole new level of fun and motivation.
We’ve found that timing each run creates healthy competition and helps us see real improvement over time. Let’s investigate some simple ways to track progress in your backyard obstacle course.
The easiest way to get started is with your smartphone’s stopwatch, but we love using dedicated fitness apps that can store our times and show improvement trends. Incorporating motor planning skills into each run helps children develop better coordination and execution strategies.
To make timing more effective, we recommend:
- Setting up clear start and finish markers using garden stakes with bright flags
- Numbering each obstacle with weatherproof signs
- Creating a simple scoreboard using a whiteboard in your garage or shed
- Taking weekly videos to analyze technique improvements
We’ve learned that keeping a simple logbook helps track everyone’s progress, and it’s incredible to see how quickly times improve!
For families with kids, try creating achievement levels like “Ninja Warrior” or “Speed Demon” based on completion times.
Don’t forget to adjust your timing challenges based on weather conditions – wet grass can make quite a difference in completion times!

